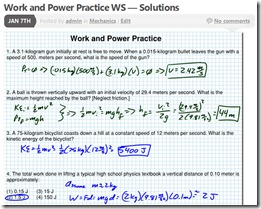
So, it’s been a few years since I’ve detailed how I make my screencasts, and my workflow and equipment have evolved as I’ve added a few bells and whistles in an attempt to make the screencasts look a touch more professional (and more fun). Some things have stayed the same, and others, well, not so much. Here’s the basic workflow.
The Computer
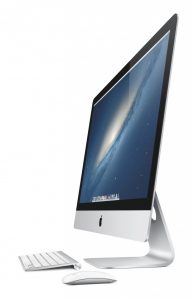
I’m still working on a Mac platform, doing most of my work on a 27-inch 2013-vintage iMac. I try to keep up to date with the latest version of the operating system, which is currently OS X Sierra. The iMac includes the higher-end graphics card (NVIDIA GeForce GTX 780M 4096 MB), has an i7 processor, and I’ve installed 32 GB of RAM. Typically when I purchase a computer I shoot for a five to six year productive life span, at which point I’ll upgrade to a newer model. This has worked pretty well for me with respect to my Mac laptops (a MacBook Pro), as the last one was in service for about six years, but I’m anticipating this iMac may continue well past that mark. It still looks beautiful, runs quickly, and with the amount of RAM and the built-in Fusion Drive, its performance doesn’t appear to be in any danger of slowing down in the near future.
Pen Displays
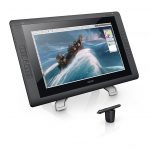
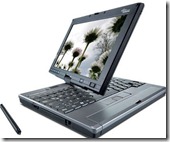
Attached to the iMac I have a Wacom Cintiq 22HD pen display unit, which is basically an external monitor that I can “write on” with a special pen, allowing me to annotate the screen as I talk through the video. I’ve previously used a Wacom DTU-1631, and am looking forward to trying out the newly-released Wacom Cintiq Pro 16 with a USB-C enabled MacBook Pro. Though the Wacom pen displays are a very significant investment, I’ve been very impressed with their quality and longevity. The DTU-1631 has lasted five years in the classroom with heavy daily use, and the Cintiq 22HD is just shy of five years of service (though a much lighter workload) and could easily pass for brand new. These monitors also hold their value extremely well over time.
Audio & Video

I’ve gotten a ton of mileage out of my Blue Yeti USB microphone… I’ve tried a number of other mics, including lapel mics, and microphones that cost more than three or four Blue Yeti’s, but I haven’t found anything that compares to the quality of the Blue Yeti, especially at its very reasonable price point. If you want to upgrade your audio from the built-in microphones, this is a very solid choice, and another piece of electronics that has held up well for more than five years of service.
I’ve put together a small office in my basement to allow for a fairly quick and seamless transition to video creation mode, which includes a foam green screen (and stand). Especially if you’re just getting started, something as simple as a green flannel blanket can work, though I have to admit, the foam green screen has held up extremely well these past few years (even with the dog sleeping on the portion that sits on the floor at least daily). They sell rather expensive lighting clips to hold the green screen to the stand, but I found quality clips at a much more reasonable price at the local hardware store.
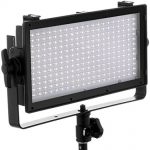
For illumination, I use a couple of super-cheap reflector work lights coupled with a Utilitech Pro floor LED and a Genaray SpectroLED SP-E-240D mounted on the ceiling. With a little bit of playing, I can obtain pretty reasonable uniform green screen illumination. I also use a couple of desktop clip-on lamps to illuminate the foreground (i.e. — my face) in the videos.
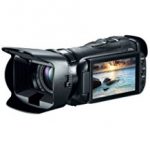
To record my face in the videos, I’m using a Canon Vixia HF G20, saving the digital video file onto an SD card. Most any digital camcorder or webcam can do the job, however. While the Canon is recording my face, I’m separately using the iMac and Telestream’s Screenflow 6 (Telestream JUST released Screenflow 7, but I haven’t tried it out yet) to record the Wacom Cintiq screen, as well as recording the input from the Blue Yeti microphone.
Recording
Prior to any recording, however, I create my “slides” for the screencasts using Apple’s Keynote software, and export those slides as a PDF. I then open the PDF using Zengobi’s Curio software, which is the software actively running on the Wacom screen that I use to annotate the slides. If you haven’t tried it out, Curio is a pretty amazing piece of software that allows you to do so much more than just write on PDF slides… if you have a Mac, it’s worth checking out for a variety of purposes!
So, the workflow. With everything set up, I have Screenflow 6 start recording the Wacom screen while recording the Blue Yeti mic, and simultaneously I start up the Canon video camera. Once I’ve gone through the lesson, I stop Screenflow from recording and stop the Canon video camera. I should now have an SD card that contains the digital video file of my face (with sound recorded from the Canon’s rather poor microphone), and a Screenflow 6 file that has video from the Wacom screen coupled with the Blue Yeti-recorded sound.
Now it’s time to put the video all together. First I export the digital video file from Screenflow 6, taking care to export at 29.97 fps and not 30 fps so that it will match up to the Canon digital video file. Then, using Final Cut Pro on the Mac (coupled with the Motion and Compressor add-ons), I create a project and import both the recorded screen video file and the video camera file. Using Final Cut, I create a combined clip from these two files and have Final Cut Pro sync them up based on the audio (although the sound from the Canon camera is poor, it’s good enough to sync the clips together). Next, I mute the sound from the Canon camera, so that I now have my recorded screen video below my “live action” video, but using only the sound from the recorded video screen, which was recorded with the Blue Yeti mic.
Editing
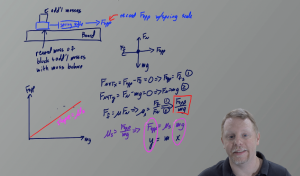
Next it’s time to edit. First step is to take care of the green screen effect (formally known as chroma key), which Final Cut Pro does quite easily. I remove the green color from the “live action” file using the “Keyer” effect, and tweak it as needed to get the desired result. I then shrink the clip down and position it where I want, so that I have the live video taking up just a small portion of the screen, the background green from the video shows as transparent, and what shows through from underneath is the recorded video from the Wacom screen.
The hard part’s done. Final steps now involve fixing any audio issues, clip editing if necessary, adding any titles, and appending on the opening and closing video sequences, which were created using Adobe Premiere Pro, After Effects, and Audition from Adobe Creative Cloud. Once I have the video looking the way I want in Final Cut Pro, I use Compressor to export it in multiple formats — high definition video for YouTube, and an APlusPhysics-specific size and quality for viewing directly from the APlusPhysics site.
Next Steps
Moving forward, I would really like to spend some time working with my old iPad to see if I can re-purpose it for use as a teleprompter. I tend to spend a lot of time up front planning my videos, but still have yet to come up with a slick, efficient way of presenting notes to myself while I’m making a video. I have to believe there’s a reasonable way to have my notes show up on my iPad and use some sort of remote (perhaps my phone?) to scroll through PDF notes on my iPad as necessary. Currently I tend to tape my paper notes to the bottom of the camera, which is chock-full of problems, messiness, and opportunity for improvement.
Back to Reality
If it sounds like there’s quite a bit of work involved, you’re not wrong, but don’t think you have to go to anywhere near this level of complexity or expense to make quality screencasts. My workflow has evolved over the years as I’ve tinkered and gone through a length set of try/fail sequences to learn what works for me and provides the level of quality I’m after. Much of what I do can be accomplished in a similar manner using fairly basic tools — Techsmith’s Camtasia software coupled with a Webcam, a USB lapel mic, and most any digitizing tablet will get you pretty solid results without a huge investment.
Even though this article is a technical how-to / what do I use, I’d still like to end with two bits of advice I’ve learned from doing things the hard way more times than I can count.
- First, and foremost, a flipped classroom is NOT about the videos, it is about building more in-class time for active learning strategies such as hands-on activities, group problem solving, deep-dives into a topic, discussions, etc. The videos themselves are such a tiny part of the whole equation, and are primarily a means to create more available class time.
- Second, though it can be fun to doctor-up your videos and add all sorts of bells and whistles, realize that these embellishments and investments of time and resources have extremely minimal payback in the form of student learning and performance. If you’re interested in doing these things, make sure you’re doing them because you want to and think it’s going to be fun, but don’t expect to see any sort of substantial learning improvement with higher quality videos (which brings me back to item one… it’s not about the videos!)
